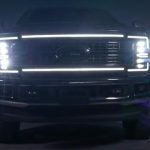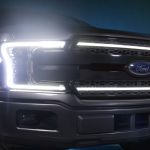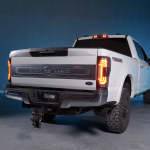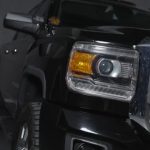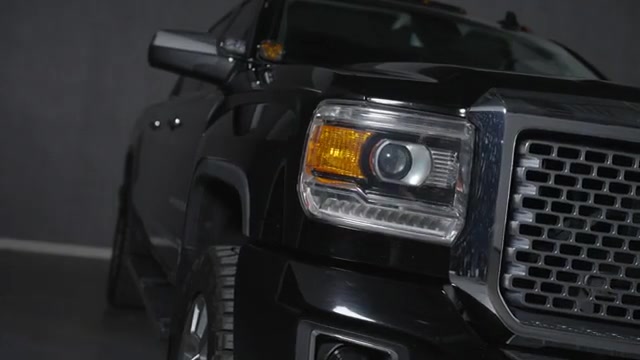
The GMC Sierra has always been GM’s top dog when it comes to pickup trucks, getting all the best features and trim options. For the 2014 to 2018 Sierra 1500 and the 2015 to 2019 Sierra HD, that meant both LED and HID headlights straight from the factory. The problem is that even the oldest of those trucks is over ten years old at this point, and those headlights are starting to look dated. Honestly, even our own original Morimoto XBs have been out for a few years now and are showing their age too. That is exactly why we are so excited to show you two brand new options: the Morimoto XB Evo GMC Sierra headlights and the XB Evo Hybrid. We put them in front of the camera, broke down every feature, and installed a set on a Sierra HD so you can see exactly what you are getting.
Meet the Morimoto XB Evo GMC Sierra Headlights
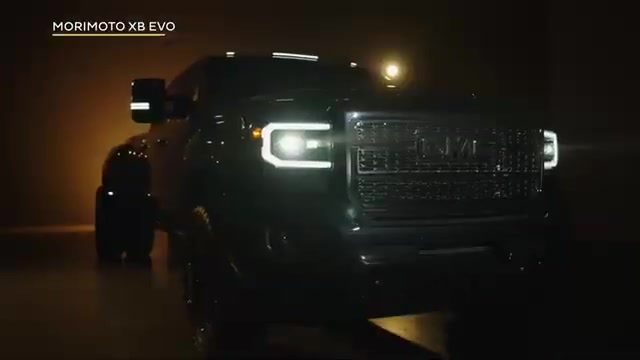
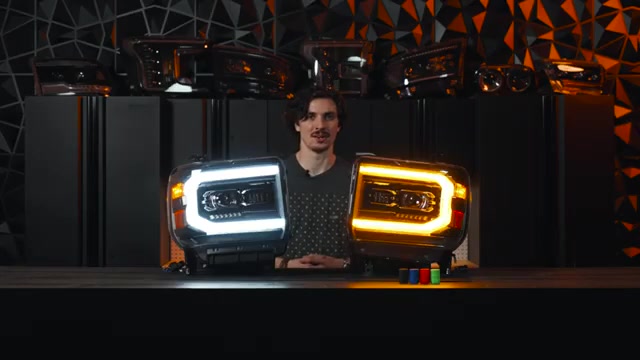
We started our walkthrough with the flagship XB Evo, and at first glance you can tell this headlight looks high-end. It features titanium and two-tone piano black internals throughout, which gives it a premium presence that looks right at home on the front of your Sierra. When we powered it on, it ran a multi-stage welcome sequence that flashes across the DRL optics, the forward-facing projector, and the D optic. It is the kind of detail that makes the headlight feel like a serious upgrade over the factory units.
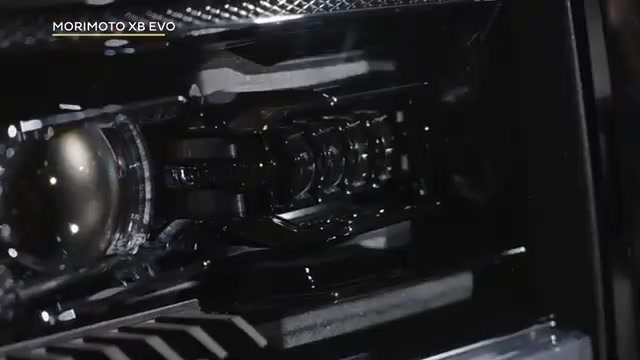
Taking a closer look at the DRL optic, it serves double duty as both your daytime running light and your turn signal. These glass-like optics are specifically designed to maximize intensity while maintaining consistent illumination no matter which angle you view them from. In person, the effect is clean and even, with no hot spots or dim corners. If you want to see how this headlight slots into the broader catalog, the full XB Evo headlight lineup is worth a look.
The Mode Selector System
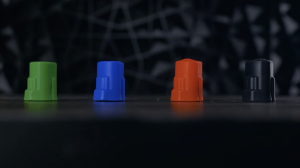
One of the standout features on the XB Evo is the mode selector system. Using the included color-coded mode selector keys, you can personalize your headlight by choosing between a white or amber daytime running light and either a fade off or sequential style turn signal. This is a big deal because it lets you dial in exactly the look you want without any extra programming or guesswork. We cover the exact key breakdown below in the install section, but the short version is that you get real control over your DRL color and turn signal style.
Projector and Beam Performance
Moving to the low and high beam optics, you will see these headlights feature a single projector along with a D optic. That projector is a type 1 Ichikoh optic bi-LED projector, and it is a high-output variant running the latest chips from Osram. It is powerful but controlled, creating a beam that is fully DOT compliant with all FMVSS 108 regulations for on-road use in the US. The D optic acts as a high beam assist, but during normal driving it is backlit by your low beam to visually fill out the headlight. When you hit the high beam, the bi-LED projector opens its cutoff shield to let more light out, and the D optic kicks in to assist. We tested each of these functions on the truck and everything behaved exactly as designed.
Frost Free System
The XB Evo also features our patent pending frost free system, which warms the surface of the lens to help mitigate snow and ice buildup when you are driving in inclement weather. If you live somewhere with real winters, this is the kind of feature that pays for itself the first time you do not have to scrape your headlights clear in the morning.
The XB Evo Hybrid Explained
After covering the flagship, we turned to the XB Evo Hybrid. It is based on the same design, so it looks very similar to the standard Evo, but it features piano black internals throughout rather than the titanium two-tone treatment. When we started it up, we noticed the Hybrid does not run the multi-stage startup sequence that the Evo has. It does, however, feature the same DRL optic that doubles as your turn signal.
The key difference is that the mode selector keys are not available on the Hybrid. Because of that, this headlight only runs a white daytime running light with a fade off style turn signal. Where the Hybrid does not compromise at all is with the low and high beam optics. It uses the exact same high power bi-LED type 1 Ichikoh optic with the Osram Oslon chips, plus the same D optic high beam assist. So if you want the strong beam performance but do not need the startup sequence or the DRL and turn signal customization, the Hybrid is a smart way to get there.
Built and Backed in Atlanta
Both of these headlights are designed, engineered, and tested right here in Atlanta, Georgia to fit like factory and function correctly on all trim levels without any issues. They replace both the factory LED and HID headlight options across the lineup. They are built to the highest standards using Osram LEDs and OE grade wiring throughout, and they are equipped with a UV protective hard coating that exceeds even the best OE headlights on the market. Because we have that much confidence in them, we stand behind them with a 5-year warranty should you run into any trouble down the road. If you are shopping for a specific truck, you can jump straight to the 14-18 Sierra 1500 XB LED headlights page to confirm fitment for your model.
Installing the XB Evo on a Sierra HD
The disassembly process varies a little depending on whether you have a Sierra 1500 or an HD. In our case we had a Sierra HD, so that is what this walkthrough covers. If you have a 1500, head over to our website and check out the dedicated install guide for your truck. For HD owners who want to bundle front and rear lighting, there is also a Sierra HD Dually headlight and tail light combo worth considering. You can also find the The Retrofit Source’s Sierra HD XB LED headlights listing if you prefer to shop there.
Removing the Grille and Bumper
Start by removing the 12 plastic push clips securing the plastic upper radiator cover, then remove the cover and set it aside. Next, remove the four 10mm bolts securing the top of the grille. Pry the grille forward in two locations on each side, and once the sides are released, firmly pull the bottom of the grille away from the truck to fully remove it.
Now remove the four 18mm bolts accessible from the top that secure the front bumper, followed by the two 16mm bolts on the underside corners in front of the front wheels. Under the center of the bumper, disconnect the wire harness by pulling back the red lock tab, then press down the black tab and pull the connectors apart. The bumper can now be removed from the truck and set aside.
Removing the Factory Headlights
Remove the one 10mm bolt on the front of the truck securing the under headlight trim, then remove the one 7mm bolt from the fender flare. Pull the outer edge of the under headlight trim out and away from the truck to release the plastic clips, then remove the trim panel. On the passenger side, remove the underhood fender trim by prying it up and pulling it forward. Remove the two 10mm bolts from the top of the headlight and the two 10mm bolts from the bottom. Lift up on the headlight tab located on the fender to release the headlight, then disconnect the wire harness from the assembly. Repeat these steps on the other side of the truck.
Choosing Your Mode Selector Key
With the Morimoto XB LED selector keys, you decide the style of your daytime running light and turn signal. Remember, these are not available on the Evo Hybrid model. The red key gives you a white daytime running light and a fade off style turn signal. The blue key, which comes equipped out of the box, gives you a white daytime running light and a sequential style turn signal. The green key gives you an amber DRL and a fade off style turn signal, and the black key gives you an amber DRL and a sequential turn signal. Install the mode selector key for your preferred mode onto the three-pin connector on the back of each headlight. You can always change them later. Just make sure the vehicle and headlights are off when swapping keys. If you plan to change keys down the line and want easier access, connect the included extension harness and route it into the engine bay during install.
Wiring and the DRL Fuse Tap
Locate the underhood fuse box on the passenger side of the engine bay by the firewall. Open the lid and remove the 20-amp fuse from the injector A odd fuse slot, number 44. Insert the fuse tap into the number 44 slot and route the harness out of the fuse box. Make a notch in the sidewall of the fuse box lid so it can close over the grommet on the DRL fuse tap wire. Connect the second longest end of the DRL harness to the fuse tap. Route the shorter end forward to the driver side headlight cavity and the longer end across the radiator support to the passenger side cavity. Identify your factory equipped headlights and attach the appropriate headlight input adapter for your truck onto the factory headlight wiring. Attach the resistor to a suitable steel surface in each headlight cavity, keeping it out of the way of the assembly. If you want to see how we route and mount add-on lighting components elsewhere, our 4Banger LED Pods install guide for the Jeep Wrangler shows similar wiring best practices.
Installing and Testing the New Headlights
Lift one of the new headlight assemblies up to the cavity and connect the headlight input adapter and DRL harness to the back. Slide the headlight onto the vehicle, making sure none of the wiring is pinched, then secure it with the factory hardware. Repeat on the opposite side. Now test and confirm that all functions work: daytime running light, parking light, turn signal, low beam, and high beam. There are three LEDs on the back of the LED driver that indicate when power is being received. Green indicates low beam power, blue indicates high beam power, and red indicates fuse tap power. If any of these are not lit when the corresponding function should be on, recheck your connections and fuses. Reassemble the vehicle in the reverse order of disassembly, tucking and securing any loose wiring.
Aiming the Low Beam
The headlights come out of the box aimed for stock ride height, but we strongly recommend fine-tuning the low beam aim after installation regardless. With the upper radiator cover removed, use a long Phillips head screwdriver down the back of the headlight to reach the adjuster gear. Park the vehicle on level ground 25 feet from a wall, then measure the distance from the ground to the optical center mark on the headlight (the circular mark on the lens in front of the projector). If that distance is less than 34 and 1/2 inches, adjust the top of the headlight cutoff to the same height on the wall. If the height is between 35 and 39 inches, adjust the cutoff on the wall to 2 inches below your measurement. If it is greater than 39 and 1/2 inches, adjust the cutoff to 3 inches below your measurement. Aiming should not require more than three full turns of the adjuster gear in either direction. And that is all it takes to transform the front of your Sierra.
Frequently Asked Questions
Which trucks fit the Morimoto XB Evo and XB Evo Hybrid headlights?
They are built for the 2014-2018 GMC Sierra 1500 and the 2015-2019 GMC Sierra HD, replacing both the factory LED and HID headlight options across all trim levels.
What is the difference between the XB Evo and the XB Evo Hybrid?
The XB Evo has titanium and two-tone piano black internals, a multi-stage startup sequence, and a mode selector system for choosing DRL color and turn signal style. The XB Evo Hybrid uses piano black internals throughout, skips the startup sequence, and does not include the mode selector keys, so it only runs a white DRL with a fade off turn signal.
What kind of projector do these headlights use?
Both models use a type 1 Ichikoh optic bi-LED projector that is a high output variant running the latest Osram chips, paired with a D optic for high beam assist. The beam is fully DOT compliant with FMVSS 108 regulations.
What mode selector key options are available on the XB Evo?
The red key gives a white DRL with a fade off turn signal, the blue key (installed from the factory) gives a white DRL with a sequential turn signal, the green key gives an amber DRL with a fade off turn signal, and the black key gives an amber DRL with a sequential turn signal.
Do the headlights need to be aimed after installation?
Yes. They ship aimed for stock ride height, but Morimoto recommends fine-tuning the low beam aim after install using the adjuster gear, measuring from a wall 25 feet away per the included distance based aiming instructions.
Meet the Experts Behind Morimoto

Jimmy Nguyen – Engineering Manager
Jimmy leads engineering at Morimoto, bringing experience across customer support, supplier management, design engineering, and validation testing. His work ensures Morimoto lighting systems are engineered for real-world reliability and long-term performance.

Mike Hicks – Quality Control Manager
Mike oversees quality assurance at Morimoto, with a background spanning returns testing, RMA analysis, vendor quality control, and manufacturer scorecards. His focus is continuous improvement and accountability across the product lifecycle.