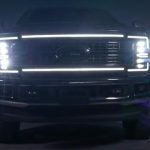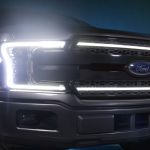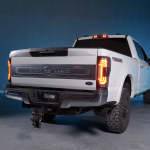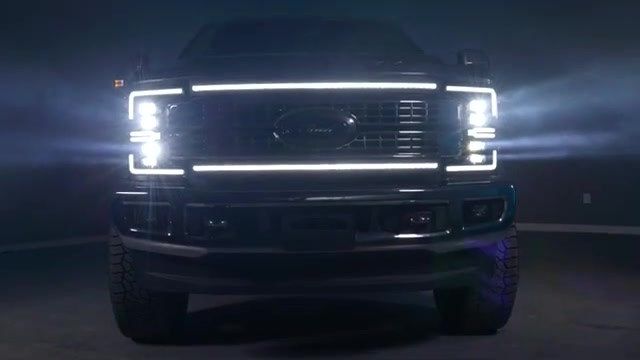
If you have been looking to give the front end of your truck a clean, modern refresh, the Morimoto XBG DRL LED grille is one of the easiest ways to make a big visual impact. We recently got hands-on with this grille and installed it on a 2017-2019 Ford Super Duty, and in this guide we are walking you through exactly how it goes together. The XBG is an LED DRL grille replacement designed specifically for the front end of these trucks, and it pairs beautifully with upgraded 2017-2019 Ford Super Duty headlights whether you keep your factory setup or move up to a full Morimoto package. Let us break down what this product is, what tools you need, and how the whole install plays out from start to finish.
What Is the Morimoto XBG DRL LED Grille?
The XBG grille is a new LED DRL grille replacement for the front end of your 2017-2019 Ford Super Duty. It is the perfect upgrade to finish off that custom front end look, and it is completely designed, engineered, tested, and distributed by Morimoto right here in the US. That matters to us because it means the fitment and the lighting have been validated for real-world use, not just slapped together and shipped out.
The grille comes in two different variations. The chrome trim is ready to install right out of the box, so if you want to keep things simple you can mount it straight away. The black trim comes in bare plastic and is designed to be removed with ease, painted or wrapped to match your truck, and then reassembled. That flexibility makes it easy to blend the grille into whatever color scheme you are running.
The star of the show is the dual intensity DRL bars. These are available with either white or amber LEDs, which ensures a perfect match for all Morimoto headlights or even OEM LED headlights. If you are running amber accents up front, you can carry that theme through, or you can keep things crisp and white to match a cooler color temperature.
Choosing Your Headlights to Match
One of the reasons we love the XBG grille is how well it ties into a complete front-end build. The install process is the same whether you are using OEM halogen headlights, OEM LED headlights, or the Morimoto XB headlights, so you can plan your build around whatever headlights you want.
If you are considering a headlight upgrade at the same time, the 17-19 Super Duty XB LED Headlights are a fantastic pairing with the amber DRL bars. We also like the XB Hybrid LED Headlights for the 17-19 Super Duty if you want a different style for your build. You can also find these through our partners, including Headlight Revolution’s 17-19 Super Duty XB LED Headlights and The Retrofit Source’s XB LED Headlights for the 17-19 Super Duty.
For those looking to take the styling even further, the Super Duty Facelift Kit (17-19 to 20-22 front end) is worth a look. And if you have the newer truck, check out Morimoto’s XB Evo headlight upgrade for the 2020-2022 Super Duty.
Tools You Will Need
Before you dive in, gather up your tools so the job goes smoothly. For this install you will want a ratchet of your choice, a 10mm socket, a longer extension, needle nose pliers, a long flathead screwdriver, pry tools of your choice, and a Phillips screwdriver if you want to customize your grille. That is the full list, nothing exotic required.
Step-by-Step Install Guide
Step 1: Remove the Plastic Push Tabs
First things first, pop the hood. On the top of the grille there are 14 plastic push tabs you have to take out. We used a pry tool to remove these plastic clips one by one. Keep in mind that when reinstalling, one of these push tabs is a little bit different than the rest, so pay attention to its location as you remove it.
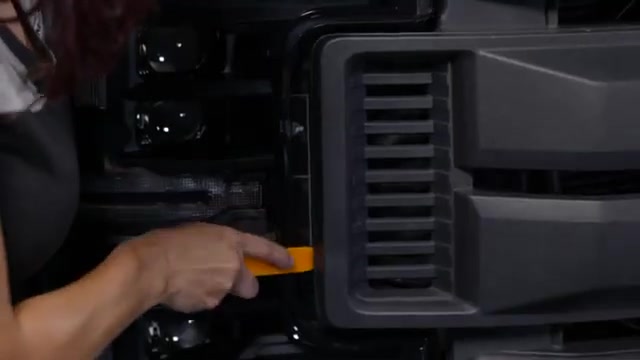
With all those push tabs up and out of the way, lift up on the plastic trim and set it aside. That exposes the hardware underneath.
Step 2: Remove the 10mm Bolts
Next, there are eight 10mm bolts along the very top of your grille. Grab your ratchet and 10mm socket and work your way across, removing each one.
With all those bolts removed, if your truck has a camera or washer system, go ahead and disconnect those two connectors. The truck we worked on did not have that, so we moved right on to releasing the grille.
Step 3: Release the Grille
Using a plastic wedge tool, locate the two sides of the grille and push up and off until you hear a slight click. Do the same thing on the opposite side, which helps release the grille off the truck. With the grille partially released, locate the four metal clips on the bottom. Using a flathead screwdriver, push down on those metal clips to help release it. It is a tad bit hard to see down there, so take your time.
On our truck, the grille had come off a few times since we work on it a lot, so those clips were a little loose. There are supposed to be four metal clips. Remove them up and out of the way, but do not stress about reusing them because the new XBG grille comes with new clips. To remove each metal clip, take a flathead screwdriver, push on the back of it, and pull it straight out.
Step 4: Remove the Passenger Headlight
With the grille fully removed, move over to the passenger headlight. This is the only headlight you have to take out. On our build we already had the new Morimoto headlight for the Super Duty installed, which is full plug and play, so it looks a little different than the OEM unit but makes the install a breeze.
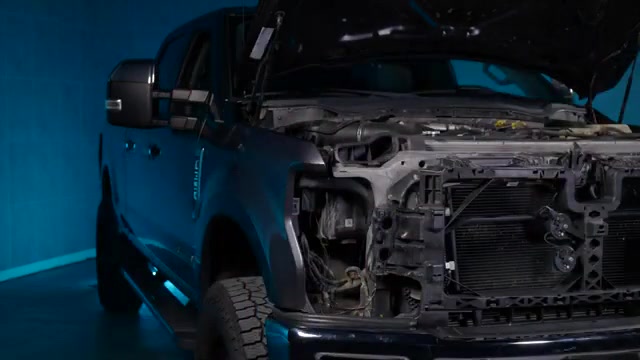
Locate the two bolts on the inside of the headlight and remove them. Then move to the very base of your headlight and, underneath your fender, remove the one 10mm bolt there. Lastly, there is one more screw on the very top of the headlight to take out. With the headlight free, gently pull it out to expose the back side where the harness is. Unplug everything and set the headlight aside.
Step 5: Install the DRL Harness
Now it is time to install your DRL harness. If you already have the XB headlights, you can skip this step because the harness is already run. If not, move up to your fuse box area on the passenger side of your truck and remove the fuse box lid. Locate fuse number 35, place the fuse tap in that slot, and push down slightly.
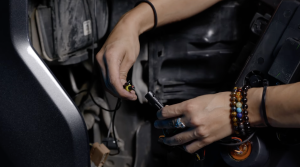
Take the rest of the excess harness and route it down to the passenger headlight area, then set it aside for the moment. The kit comes with two headlight harnesses, one for LED setups and one for halogen. Since our truck was running OEM halogen, we used the halogen harness. This is basically a jumper harness that lets your headlights connect to the new grille. Plug it into your factory harness. The only thing that looks a little different is the daytime running light harness connection, so get that connected and you are good to go.
Step 6: Connect the Grille Harnesses and Reinstall the Headlight
You will also find additional harnesses in the kit. Some connect to your headlights, and two others are used to connect to the grille. Set the grille harnesses aside for now, since we use them later. On our truck, one harness went unused because we have the Morimoto XB headlights, as that particular harness is meant for OEM style headlights.
Grab your headlight and get it reinstalled. Reconnect everything, and make sure to tuck all of the harness to the back side of the headlight housing so it does not pinch any wires later. Then reinstall all the bolts you removed.
Step 7: Transfer the Ford Emblem
Over at the table, the last thing you need from your factory grille is your Ford OEM emblem. Set the grille on its face on a soft surface. There are three 10mm bolts holding the emblem on. Use only hand tools here because you can strip these out if you are not careful. Lift up on the grille to release the Ford emblem, then set the old grille aside.
Line that Ford emblem up to the holes on your new XBG grille, then thread those three nuts back down. Do not over tighten them since you are working with plastic. We went with the chrome version on this build, and it looks so good on the front end of this Ford. If you have a camera and washer system in your grille, refer to our install guide for that process.
Step 8: Install the XBG Grille
The moment has finally come. Connect the grille wires, and keep in mind these plugs do not care which one goes into which, they are the exact same thing. Push the wiring back so it does not interfere with the grille when seating it. When you set the grille in place, do not forget to push on those very bottom metal clips. You will hear a slight click letting you know it is in.
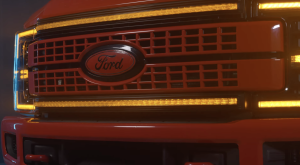
And just like that, the new XBG grille is installed, in our case alongside the new Morimoto headlights. This thing looks absolutely awesome. Remember, the install is the same whether you run the grille with amber LED strips or white, and whether you keep OEM headlights or step up to the Morimoto XB headlights. Everything you need comes in the box, you just choose your colors. If you go with the black grille, it arrives in bare plastic and is designed to get paint matched, while the chrome version is ready right out of the box.
Final Thoughts
The Morimoto XBG DRL LED grille is one of the cleanest and most straightforward ways to transform the front end of a 2017-2019 Ford Super Duty. Between the dual intensity DRL bars, the choice of white or amber LEDs, and the chrome or paintable black trim options, there is a configuration here for just about any build. Pair it with your choice of 2017-2019 Ford Super Duty headlights and you have a front end that genuinely stands out. We had a great time with this install, and we think you will too.
Frequently Asked Questions
What is the Morimoto XBG grille?
It is a new LED DRL grille replacement for the front end of a 2017-2019 Ford Super Duty, designed, engineered, tested, and distributed by Morimoto in the US.
What color options are available for the DRL bars?
The dual intensity DRL bars are available in either white or amber LEDs, allowing a match with Morimoto headlights or OEM LED headlights.
What trim options does the XBG grille come in?
It comes in two variations: a chrome trim that is ready to install right out of the box, and a black trim that comes in bare plastic and can be removed, painted or wrapped, then reassembled.
What tools are needed for the install?
A ratchet, a 10mm socket, a longer extension, needle nose pliers, a long flathead screwdriver, pry tools, and a Phillips screwdriver (for customizing the grille).
Do you need to replace the headlights to install the XBG grille?
The passenger headlight must be removed to run the DRL harness, but the install process is the same whether using OEM halogen headlights, OEM LED headlights, or Morimoto XB headlights.
Meet the Experts Behind Morimoto

Jimmy Nguyen – Engineering Manager
Jimmy leads engineering at Morimoto, bringing experience across customer support, supplier management, design engineering, and validation testing. His work ensures Morimoto lighting systems are engineered for real-world reliability and long-term performance.

Mike Hicks – Quality Control Manager
Mike oversees quality assurance at Morimoto, with a background spanning returns testing, RMA analysis, vendor quality control, and manufacturer scorecards. His focus is continuous improvement and accountability across the product lifecycle.