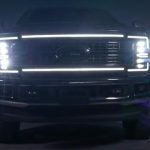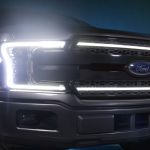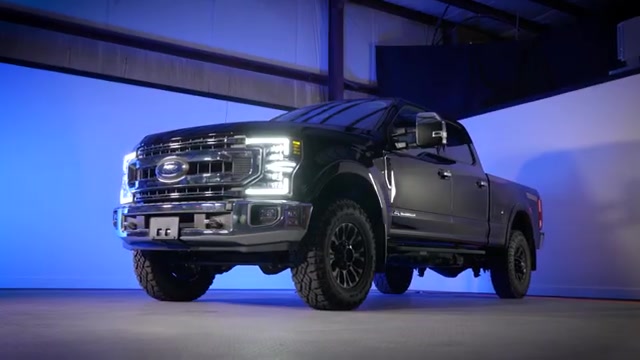
We launched the 2020 to 2022 Super Duty headlight almost five years ago. It was one of my favorite designs at the time. But it was time for an update, and we could not be more excited to show you what we built. Meet the new Morimoto XB Evo Super Duty lineup featuring the XB Evo, XRGB Evo, and Evo Hybrid. We tested and installed all three on our own truck. In this guide we will walk you through everything they offer plus a complete step-by-step installation.
A Ground-Up Rebuild for the 2020-2022 Super Duty
The all-new XB Evos are not a light refresh, they are a ground-up rebuild. At the core of every model are four bi LED Type 1 Ichikoh optics projectors designed by Morimoto. Because all four projectors are bi-LED, every one of them serves as both your low beam and your high beam. They are powered by the latest Nichia LED chips from Japan. They are also some of the brightest headlights we have ever offered.
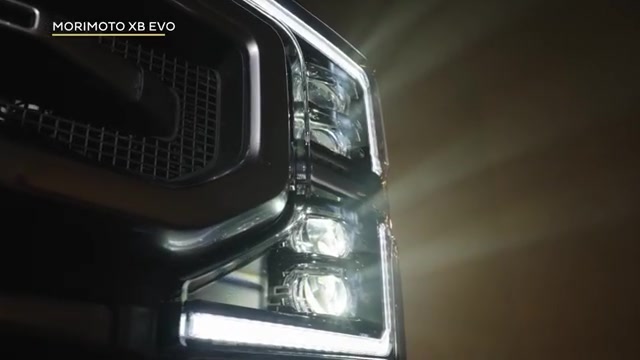
The standard XB Evo projectors are already operating at the maximum output allowed for DOT compliance. If your vehicle is built for off road use, we also offer Supercharged Drivers, which increase projector output by approximately 30%. Because of their increased output, they are not DOT compliant and are intended for off road use only. We’ll walk through their installation later in this guide.
Built to Last
These headlights are built to last. Every XB Evo features OE grade wiring and a UV coating that exceeds even the industry standard. Because of that build quality, we are proud to stand behind them with a five-year warranty. If you want to browse the broader family, take a look at the XB Evo and XB Evo Hybrid headlight lineup to see how the options compare side by side.
Even DRL Distribution and Mode Selector Keys
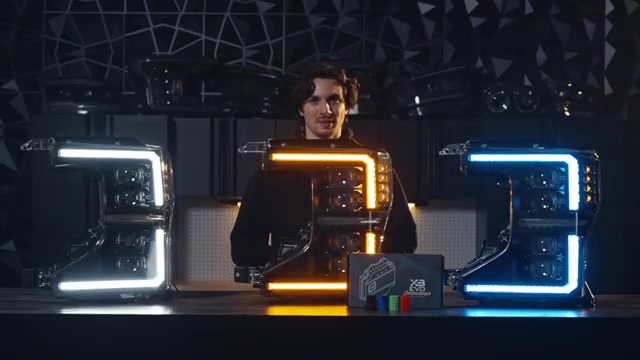
The textured DRL optics provide a bright, even light from any angle. XB Evo also includes signal swap mode selector keys, letting you switch between white or amber DRLs and choose between fade-off or sequential turn signals.
Looking inside the housing, you will notice electroplated titanium surfaces throughout, giving the headlight a beautiful OE plus design that fits on any build. These headlights also feature our welcome sequence, which flashes across the daytime running light and the projectors. It was always really popular on the Gen 1, so we carried it over here.
The Frost-Free System
One of the new standout features of the XB Evo is the frost-free system. The headlight has lens heaters integrated into it, and when the temperature drops below 41 degrees Fahrenheit, you can request them on to blow hot air onto the inside of the lens. That prevents snow and ice buildup in frosty conditions. This is unique to the XB Evo, and as you will see below, it is not carried over to the XRGB Evo or the Evo Hybrid.
Stepping Up to the XRGB Evo
While the XB Evo looks right at home on any build, if you are building a show truck and want to take things further, you need the XRGB Evo. These feature RGBWA daytime running lights, which means full RGB plus dedicated white and amber chips for a pure white DRL when you want it, or pure amber for the DRL and turn signal.
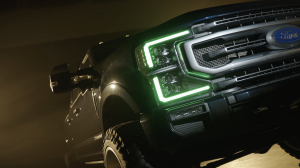
The XRGB Evo swaps the titanium interior for a piano black finish that pairs perfectly with the RGB DRL. The RGB system is controlled through the free Morimoto XB T Bluetooth app, while the non DOT compliant design allows for a smoked side marker instead of amber.
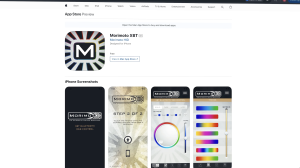
Because of the added RGB features, the XRGB Evo does not carry over the frost-free lens heater system from the XB Evo. However, it keeps all the same great core features. When you are driving on the road and not using the RGB daytime running light, the XRGB Evo still has the mode selector keys, so you can default it to a white or amber daytime running light and choose between the fade-off or sequential turn signal. It is also still compatible with the supercharged drivers for extra output. If you want a matched front and rear look, Headlight Revolution offers a headlight and tail light combo for the F-350.
The Evo Hybrid for Pure Output
If all you care about is those four bi-LED type one Ichikoh optic projectors, the XB Evo Hybrid is the one for you. It uses the same core architecture and design as the XB Evo and XRGB Evo, but with some of the extra bells and whistles stripped out.
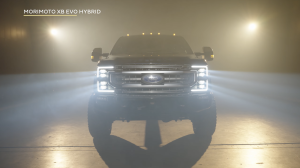
The Hybrid does not feature the mode selector keys and comes only with a white daytime running light and a fade-off turn signal, which still look great in my opinion. It has a piano black interior that matches the XRGB, and like the XRGB it does not include the lens heaters. That said, the Evo Hybrid is no slouch, featuring the same four bi-LED projectors, the same daytime running light optics, and the same industry-leading build quality and attention to detail. It is also still compatible with the supercharged drivers, and while the Hybrid does not come with the welcome sequence as standard, adding the supercharged drivers will add that feature to the Hybrid model.
All three of these headlights are designed, engineered, and tested right here in Atlanta, Georgia. All three feature the same build quality, the same five-year warranty, and all three come with everything you need to install on your Super Duty regardless of trim. If you want to see the whole picture beyond headlights, check out the complete Super Duty lighting upgrade kit. And if you like this style of detailed walkthrough, we did something similar in our 370Z lighting upgrade guide on the Morimoto blog.
Installing the Morimoto XB Evo Super Duty Headlights
Now let’s quit talking about them and get them on the truck. This install is straightforward with basic hand tools, and we walked through it exactly as shown below.
Step 1: Remove the Radiator Cover and Grille
Raise the hood of your truck and remove the 14 (or 16 on some models) plastic push clips securing the radiator cover. Pry up on the top center portion of each clip, then pry out the lower body of the clip. Remove the radiator cover and set it aside. Next, remove the six 10-mm bolts and two 10-mm nuts along the top of the grille.
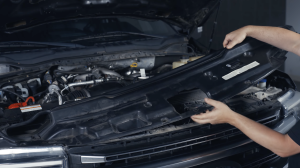
Identify your stock grille between the options shown. Our truck had the type one grille with the plastic bolt covers. To remove it, use a pry tool to pry loose the bolt cover toward the bottom of the grille. Underneath is a 10-mm bolt, which you should remove, then repeat on the opposite side. Firmly pull the grille forward from the upper corners to release the top of the assembly. With the grille angled forward, use a flat screwdriver to press down on the four metal clips at the bottom to release it. Disconnect the front camera and camera washer if your truck is equipped with them, then remove the grille and set it aside.
Step 2: Remove the Factory Headlights
Remove the one 13-mm bolt on the lower corner of the headlight, located behind the rubber seal between the fender and the bumper. Remove the two 10-mm bolts on the top of the headlight. Lift up on the tab at the top and rock the assembly slightly forward. Disconnect all wiring from the back of the headlight, which will vary between models, and set the assembly aside. Repeat on the opposite side.
Step 3: Choose Your Mode Selector Key
If you opted for the XB Evo or XRGB Evo, use the Morimoto XB mode selector keys to decide your daytime running light and turn signal style. The red key gives a white daytime running light with a fade-off turn signal. The blue key, which comes pre-installed, gives a white daytime running light with a sequential turn signal. The green key gives an amber daytime running light with a fade-off turn signal. The black key gives an amber daytime running light with a sequential turn signal. Install the key for your preferred mode on the three-pin connector on the back of each headlight. This can always be changed later, but make sure the vehicle and headlights are off when changing keys. If you want easier access after install, connect the included extension harness and route it to a more accessible part of the engine bay.
Step 4: Install the Supercharged Drivers (Optional, Off-Road Only)
If you purchased the Morimoto XB supercharged headlight drivers, which are sold separately and for off-road use only, remove the three Phillips head screws securing the standard driver to the back of the headlight. Pull the driver off the housing, depress the clip on each driver connector, and pull to disconnect it from the internal headlight wiring.
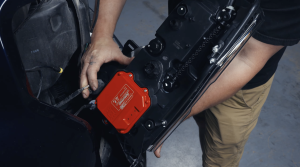
Apply a thin layer of the included grease to the outer edge of the seal on the new driver. Connect the supercharged driver to the internal wiring, making sure the tab on each connector clips in securely. Press the driver straight onto the mounting location, ensuring the rubber seal seats properly and does not pinch or bunch. Secure it with the original three Phillips head screws, hand tightening in a star pattern so the driver seats evenly against the housing.
Step 5: Wire the DRL Fuse Tap
Locate the fuse box in the engine bay on the passenger side by the firewall. Open the lid and remove the 10 amp fuse from slot number 16. Make a notch in the sidewall of the lid so it can close over the grommet on the DRL fuse tap wire. Insert the fuse tap into slot 16 and route the harness out of the fuse box. Route the shorter end of the DRL harness forward to the passenger side headlight cavity, then connect the second longest end of the DRL harness to the fuse tap. If you are installing the XRGB model, route the included RGB crossover harness between the two headlight cavities following the same path as the DRL harness.
Step 6: Install the New Headlights
Lift one of the new headlight assemblies to the cavity. Connect the DRL harness and either your factory LED connector for an LED equipped truck or the input adapter harness for OE halogen trucks to the back of the housing. If you have an LED truck, the LF508H-LED adapter harnesses for OEM LED trucks make this connection clean. If installing the XRGB model, connect the RGB crossover harness as well. Slide the headlight onto the vehicle, making sure no wiring is pinched, and secure it with the factory hardware. Repeat on the opposite side.
Step 7: Test, Reassemble, and Aim
Test and confirm that all functions work: daytime running light, parking light, turn signal, low beam, and high beam. There are three LEDs on the back of the driver that indicate power: green for low beam, blue for high beam, and red for the fuse tap. If any function is not illuminating its indicator, recheck your connections and fuses. Reassemble the front of the vehicle in reverse order. The headlights come aimed for stock ride height, but we recommend fine-tuning the low beam aim after install. Using a T30 Torx driver at the adjuster gear, park on level ground 25 feet from a wall and measure from the ground to the optical center mark between the top two projectors. If the height is between 35 and 39 inches, set the cutoff 2 inches below your measurement. If it is greater than 39.5 inches, set it 3 inches below. Factory ride height is typically around 44 inches. Aiming should not require more than three full turns in either direction, as over-adjusting can damage the adjuster. For more Super Duty and other model options, browse the range of vehicle-specific LED headlight assemblies at The Retrofit Source.
Frequently Asked Questions
What projectors do the Morimoto XB Evo Super Duty headlights use?
They use four bi-LED type one Ichikoh optics projectors designed by Morimoto, powered by Nichia LED chips from Japan, with all four functioning as both low and high beam.
Are the Morimoto XB Evo headlights DOT compliant?
Yes, the standard XB Evo and Evo Hybrid projectors run at the limit of DOT compliance. The optional supercharged drivers and the XRGB Evo’s RGB daytime running light are not DOT compliant. Off-road use only!
What is the frost-free system on the XB Evo headlights?
The XB Evo features integrated lens heaters that can be activated below 41 degrees Fahrenheit to blow hot air onto the inside of the lens and prevent snow and ice buildup. This feature is not included on the XRGB Evo or Evo Hybrid models.
How do the mode selector keys work on the XB Evo headlights?
Color-coded keys let you choose your daytime running light and turn signal style. The red key provides a white DRL with a fade-off turn signal, while the blue key (pre-installed) provides a white DRL with a sequential turn signal. The green key delivers an amber DRL with a fade-off turn signal, and the black key provides an amber DRL with a sequential turn signal.
What is the difference between the XB Evo, XRGB Evo, and Evo Hybrid?
The XB Evo includes mode selector keys, frost-free lens heaters, and a titanium interior. The XRGB Evo adds app controlled RGBWA DRLs, a piano black interior, and smoked side markers, but drops the lens heaters and DOT compliance. The Evo Hybrid shares the same projectors and build quality but features only white DRLs with fade off turn signals and no mode keys or lens heaters.
Meet the Experts Behind Morimoto

Jimmy Nguyen – Engineering Manager
Jimmy leads engineering at Morimoto, bringing experience across customer support, supplier management, design engineering, and validation testing. His work ensures Morimoto lighting systems are engineered for real-world reliability and long-term performance.

Mike Hicks – Quality Control Manager
Mike oversees quality assurance at Morimoto, with a background spanning returns testing, RMA analysis, vendor quality control, and manufacturer scorecards. His focus is continuous improvement and accountability across the product lifecycle.