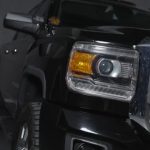
Second gen Sequoia owners, this one is for you. We spent time with the all new XB Evo and Evo Hybrid headlights built specifically for the 2008 to 2017 Toyota Sequoia (and shared with the 2007 to 2013 Toyota Tundra), and we came away impressed. These trucks have aged really well, but the factory halogen headlights are a dead giveaway that the platform is pushing 20 years old at this point. In this guide we walk through everything we tested and everything we installed, from the internals and optics all the way to aiming your low beam cutoff after the swap.
If you want to see the full family of assemblies before we dig in, the Morimoto XB Evo LED and XB Evo Hybrid Headlights lineup is a good place to start, and the truck-specific fitments live under the Sequoia and Tundra XB Evo headlight assemblies page. These are a much needed upgrade that brings your truck to modern day standards without looking out of place.
Morimoto XB Evo Sequoia Headlights: The Full Overview
Starting with the Evo model, the first thing we noticed is that the internal surfaces feature a mix of titanium and piano black finishes. It reads as very OE plus, and it looks right at home on the truck. That two-tone treatment is one of the details that separates the Evo from the Hybrid, and it gives the assembly a premium presence during the day even before the lights come on.

TIR Optic Daytime Running Light
The Evo carries a modern LED daytime running light made from a glass-like TIR optic that is designed to maximize intensity and evenly distribute light across the DRL. These DRLs really pop. They even feature a topographic pattern etched onto the side of the optics. It is subtle, but it catches the light in a really cool way, and it quickly became one of our favorite features on the whole headlight. The daytime running light also doubles as your turn signal, so the DRL optic is doing double duty.

Motive Select Keys for DRL Color and Turn Signal Style
What color the DRL runs and what style the turn signal uses is up to you. Using Morimoto’s proprietary Motive Select keys, you can choose between a white or amber daytime running light, and a fade-off or sequential style turn signal, simply by swapping the included selector keys on the back of the headlight. The red key gives you a white DRL with a fade-off turn signal, the blue key gives you a white DRL with a sequential signal, the green key gives an amber DRL with a fade-off signal, and the black key gives an amber DRL with a sequential signal. This signal swap system is Evo-only.

Like many other XB Evo models, these headlights also feature a startup sequence that flashes across the daytime running light and the forward-facing projector and reflector optics whenever you start your truck.
Ishida Type One Bi-LED Projectors and LED Reflector
Speaking of those projectors, these headlights feature Morimoto’s Ishida type one bi-LED projectors along with an LED reflector that acts as both a low and high beam assist. Both the projector and the reflector use the latest Osram automotive LEDs, and they provide a very comfortable, modern driving experience that is much more comfortable than the old halogens. It is an incredibly bright setup, but it is also very well controlled and distributed, which makes for a fully compliant beam for on-road use.

If you are more interested in off-road use, Morimoto also offers the XB Supercharged drivers. These are not compliant for on-road use, but they increase the output of your headlights by about 30%. Another great feature of the XB Evo is the patent-pending frost-free system, which blows hot air on the inside of the headlight lens to mitigate snow and ice build-up in icy conditions.
XB Evo Hybrid: Same Performance, Fewer Extras
If you do not need all of those features and all you care about is performance, the XB Evo Hybrid might be the better fit. At first glance the Evo Hybrid looks pretty similar to the Evo, but this one features full piano black internals rather than the two-tone finish. The Hybrids have the same TIR DRL optic with the topographic pattern etched into it.

The Hybrids are not compatible with the signal swap system, so they are only available with a white daytime running light and a fade-off sequential signal. The Hybrid also has the lens heater stripped out of it. It does have the same great Ishida bi-LED projectors and LED reflector optics, and yes, that means the Hybrid is also compatible with the XB Supercharged driver system. Out of the box the Hybrids do not feature the startup sequence, but if you opt for the Supercharged drivers (for off-road use only), that unlocks the startup sequence feature.
You can compare both versions and check current pricing on the 08-17 Toyota Sequoia XB LED Headlights product page. You can also find them through our retail partners, including the Sequoia XB LED Headlights at Headlight Revolution and The Retrofit Source’s Sequoia headlight listing.
Built and Backed in Atlanta
Both of these headlights are built to the highest standards, all designed, engineered, and tested right here in Atlanta, Georgia. We truly wanted to make these the best option for the second-gen Sequoia. Both headlights are fully DOT and FMVSS 108 compliant for on-road use in the US. They are designed to fit exactly like factory with OE grade wiring and premium materials throughout. The UV lens coating is designed to be better than even the factory Toyota coating, which is one of the best in the industry. Because of all of that, both headlights are backed by a 5-year warranty.
How to Install the Morimoto XB Evo Headlights on Your Sequoia
With the overview out of the way, we went ahead and installed these on our Sequoia. Here is the full process step by step.
Step 1: Remove the Factory Headlights
Raise the hood of the truck. If your vehicle came equipped with the factory headlight washers, pull the washer arm out and use a pick or a small pry tool to release the two tabs that secure the washer arm cover, then remove the cover and set it aside. On the fender extension panel below the headlight, pop out the heads of each of the two clips and remove the clips. Remove the fender extension panel by pulling it forward with a bit of force, but be careful not to flex it side to side, which could break the two tabs that secure the panel, especially on an older truck.
Remove the 10 mm bolt that secures the side of the headlight housing, then remove the two 10 mm bolts on the top of the headlight. Lift up on the two tabs on the top of the headlight, and release the lower headlight tab by lifting up on the bottom and pulling slightly forward. Disconnect all of the connections on the back of the housing. If your vehicle has the headlight washers, flip the headlight over and use a number two Phillips head screwdriver to remove the screws securing the washer arm to the housing. Set the assembly aside and repeat everything on the opposite side.

Step 2: Choose Your Mode Selector Key (Evo)
With the Morimoto XB mode selector keys, you decide the style for your daytime running light and turn signal. Choose the color coded key for your preferred style: red for a white DRL and fade-off turn signal, blue for a white DRL and sequential signal, green for an amber DRL and fade-off signal, and black for an amber DRL and sequential signal. Install the selector for your preferred mode onto the three-pin connector on the back of each headlight. This can always be changed after install, but make sure the vehicle and headlights are off before changing the selector.
Step 3: Install the Optional Supercharged Drivers (Off-Road Only)
If you purchased the Morimoto XB Supercharged headlight drivers, which are sold separately and for off-road use only, remove the four Phillips head screws securing the standard driver to the back of the headlight. Depress the clip on each driver connection and pull to disconnect the driver from the internal wiring. Apply a thin layer of the included grease to the outer edge of the seal on the new driver. Connect the new Supercharged driver to the internal wiring, making sure each connector tab clips securely into place. Press the driver straight into the mounting location, making sure the rubber seal is seated properly and does not get pinched. Secure it with the original four screws, hand tightening in a star pattern so the driver seats evenly.

Step 4: Wire the DRL Harness
Open the fuse box located behind the driver side headlight. Locate and remove the 10 amp ignition fuse, then install the provided fuse tap into the fuse slot. Using a drill or small cutting tool, make a notch in the side wall of the fuse box lid so the lid can close over the grommet. Connect the second longest end of the DRL harness to the fuse tap. Route the shorter end forward to the driver side headlight cavity and the longer end across the radiator support to the passenger side cavity.
Step 5: Mount Resistors and Connect the Input Harness
Attach one of the provided magnet mount resistors onto a suitable steel surface in the headlight cavity, making sure it is out of the way of the headlight assembly. Connect the input harness to the vehicle’s OE low beam, high beam, turn signal, and side marker plugs, as well as to the resistor.
Step 6: Reconnect and Test
If you have the factory headlight washers, lift the headlight up to the vehicle and secure the washer arm to the bottom using the three factory screws. Connect the DRL harness, the input harness, and if equipped, the adjuster motor to the back of the housing. Get in the vehicle and confirm that all functions work: daytime running light, parking light, turn signal, low beam, and high beam. If troubleshooting is needed, there are three LEDs on the back of the driver that indicate power. The green light indicates the low beam is receiving power, the blue light indicates high beam, and the red light indicates the fuse tap. If any of these are not lit when the corresponding function should be on, recheck your connections and relevant fuses. Tuck and secure any loose or excess wiring, then reassemble the front of the vehicle in reverse order.
Step 7: Aim the Low Beam
The headlights come out of the box aimed for stock ride height, but we recommend fine-tuning the low beam aim after installation regardless. Use a long Phillips head screwdriver down the back of the headlight to the adjuster. Park on level ground 25 feet from a wall, then measure the distance from the ground to the optical center of the projector, which is indicated by the small circular feature on the lens. If that distance is between 35 and 39 inches, adjust the cutoff to 2 inches below your headlight measurement. If the height is greater than 39.5 inches, adjust the cutoff to 3 inches below your measurement. Factory ride height typically falls around 41 inches. Aiming should not require more than three full turns of the adjuster in either direction, as over-adjusting may damage the adjuster.
And that is really all it takes to transform the look of your Sequoia and your driving experience. We will see you on the road.
Frequently Asked Questions
What vehicles fit the Morimoto XB Evo and Evo Hybrid headlights shown here?
They are built for the 2008-2017 Toyota Sequoia and are also shared with the 2007-2013 Toyota Tundra.
What is the difference between the XB Evo and XB Evo Hybrid?
The Evo has two-tone titanium and piano black internals, a startup sequence, a frost-free lens heater, and is compatible with the Motive Select signal swap keys for white or amber DRL and fade or sequential turn signal. The Hybrid has full piano black internals, no lens heater, no startup sequence out of the box, and is only available with a white DRL and fade-off sequential signal.
What projector and reflector technology do these headlights use?
Both models use Morimoto’s Ishida type one bi-LED projectors along with an LED reflector that acts as both low and high beam assist, using the latest Osram automotive LEDs.
Are these headlights legal for on-road use?
Yes, both the XB Evo and Evo Hybrid are fully DOT and FMVSS 108 compliant for on-road use in the US.
What do the Morimoto XB Supercharged Drivers do?
The Supercharged Drivers, sold separately, increase headlight output by about 30% for off-road use only and are not street legal. On the Evo Hybrid, installing them also unlocks the startup sequence feature.
Meet the Experts Behind Morimoto

Jimmy Nguyen – Engineering Manager
Jimmy leads engineering at Morimoto, bringing experience across customer support, supplier management, design engineering, and validation testing. His work ensures Morimoto lighting systems are engineered for real-world reliability and long-term performance.

Mike Hicks – Quality Control Manager
Mike oversees quality assurance at Morimoto, with a background spanning returns testing, RMA analysis, vendor quality control, and manufacturer scorecards. His focus is continuous improvement and accountability across the product lifecycle.